Friday, February 25, 2011

Organization 1

Hello There,
Too many times I find myself in a rut and I don't know what I want to create. Then when I do figure it out I am left searching for the right products to use. You see, I have all kinds of inks and papers and other supplies from many different companies and when I want to work on something, I kinda get discouraged with the way I have everything spread out. So the other day I started to organize some of my embellishments by color the other day, not worrying about what company they are from. My thought is that it will help me find what I am looking for in the color family that I want. That is all fine and good and probably will work for me.
As I was doing this, I realized that I have other inks that I really like to use but seldom do, due to them hiding away in a drawer that I hardly ever go into. So I started to make a binder that would allow me to see the complete list of a particular product that a company makes. With this "list" I made a "chart" and left spaces so that I can fill them in with that particular product, a swatch if you will. Now I only made charts for the product lines that I have. As I build my stash, I will make swatch charts for them as well.
I also plan on making swatch charts with my embossing powders too. Who knows, flipping thought the book may inspire me.
Here is a close up photo and explanation of how this system will work:
CTMH Ink pads:
The space above is where I stamped an image in the color that is labeled below it. This allows me to see what the color will look like when it is completely dried and stops me from ordering another stamp pad in that color. The dot next to the name tells me that I have this color in a re-inker as well. So no need to re order. ;-) The bottom of each page tells you the company and what the product is.
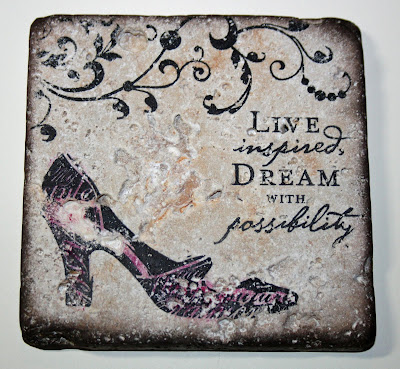
The stamp used is from CTMH and is only available the month of June for it is the featured Stamp of the Month.

Here is what the pages look like:

I chose to do this with my stickles as well. The product looks sooo much different when it is out of the bottle. So now when I want to use them all I have to do is look at my swatches and pick out the best one for the project.


Within the binder there will be sections. Each section will be for something specific, Like ink pads, Markers, glimmer mists, paints, card stock and then I will have a separate binder for my Stamps.

This system is sure to help me find the right inks, paper or whatever I want for whatever I am creating.

I hope that this will help you get organized and keep you productive.

Friday, February 11, 2011

Wings workshop part 2

As promised here are some additional layout that I have made using the Wings workshop kit along a few other items. Enjoy.


Thursday, February 10, 2011

Wings workshop kit

Hi everyone.

I just wanted to post this workshop kit so that you all can see the beautiful papers. I am working on additional lo's using this kit and will post as soon as they are done.
I do apologize for the poor quality in the photo.

It comes with:
~Wings level 2 paper pack ( *12 12"x12" pattern papers~ 2 each of 6 double sided patterns
* 10 12"x12" Card stock sheets coordinating with the pattern paper)
~ My Acrylix Workshop Stamp set
~Mini-medley accent black collection
~Spray Pen
~Workshop guide (which tells you how to recreate this lo plus how to make cards.Plus an optional lo from the Magic book by Jeanette Lynton which you would have to purchase separately)
You can see this kit along with others in our new Idea Book. Just click on the book in the side bar and it will take you right to it. If you are interested in purchasing this kit (or other CTMH products) please click on the shop with me icon in the side bar on the upper right corner of my blog.

Wednesday, February 9, 2011

Tile coasters

Last night I was playing around with some tiles that I had picked up a while back. I have been wanting to make coasters with them for use on the patio. I am also planning on making a tray with the tiles. I just need to get the tray and the grout. When I saw this stamp set from CTMH, I knew that this is what I wanted to use.
I also used various stamp sets for the sentiments and vines. Here are some photos of the tiles before the finishing touches.

As I finished stamping and coloring the tiles I thought to my self, "Hmmmm, It needs a little more." So what Do I do? I inked the edges of course!! If you know me, I ink the edges of everything, so why should this be any different? I think that it adds a little more depth to the tile and draws your eye to the images and makes them pop.

This is a porous surface and you do not need to seal the tile if you want them to be functional and "soak" up the "sweat" from the glass. The trick with using Stazon ink with Stazon Ink is to gently dab the color on. It will smear the other color if you rub because it will reactivate the previous Stazon ink that was applied. So I use a Q-tip to gently add the color. I also dabbed the color off the Q-tip some so that it wouldn't be so dark.
This is what they look like when I finished "edging" them with the ink.
All inks used are Stazon inks.
You can submerge your tiles into water and they will not smear or run! How cool is that?!
The only thing left to do now is to used some cork for the base so that it won't scratch any table surfaces. I just used what I had left over form a lo that I had made a few years back. I found that using felt eventually starts to pile and come apart. So my hopes are high for the cork. Thanks for taking a peak!!

Tuesday, February 8, 2011

Flowers

Hi everyone.

I just want to share with you what I have been working on. This was my first attempt at these flowers and I have to say that I am happy as to how they turned out.


They started out as plain white Daisy card stock from CTMH. I then cut flowers out using my cricut. After that I inked only the edges with two shades of pink. Using my stylus, I burnished the paper to give it the round bend up.

As for the leaves, they were also cut from my cricut. I didn't have many choices of green card stock so I went with what I had and changed the color by inking and chalking. Here is a pic of before and after. The bottom vine is before and the top is after.

I am hoping to put up tutorial on how I made the leaves. The only way I can do that is if my son's laptop is working. He may have a virus. I really need to get a video recorder. lol

Wednesday, February 2, 2011

Random photos

Well, my plan to take a photo a day has not been working out. I started with good intentions. I think I will post as I go. There really isn't much to take a picture of when I don't get out of the house that often. So, I felt limited and a bit frustrated. This isn't supposed to be a frustrating thing so I have come to the conclusion that I will post pics when I have them.


SO with that being said here are a few photos.